Why Calming Neutrals Are Taking Over Quilting (Plus a Clever DIY)
Jennifer Jones ·
Listen to this article~8 min
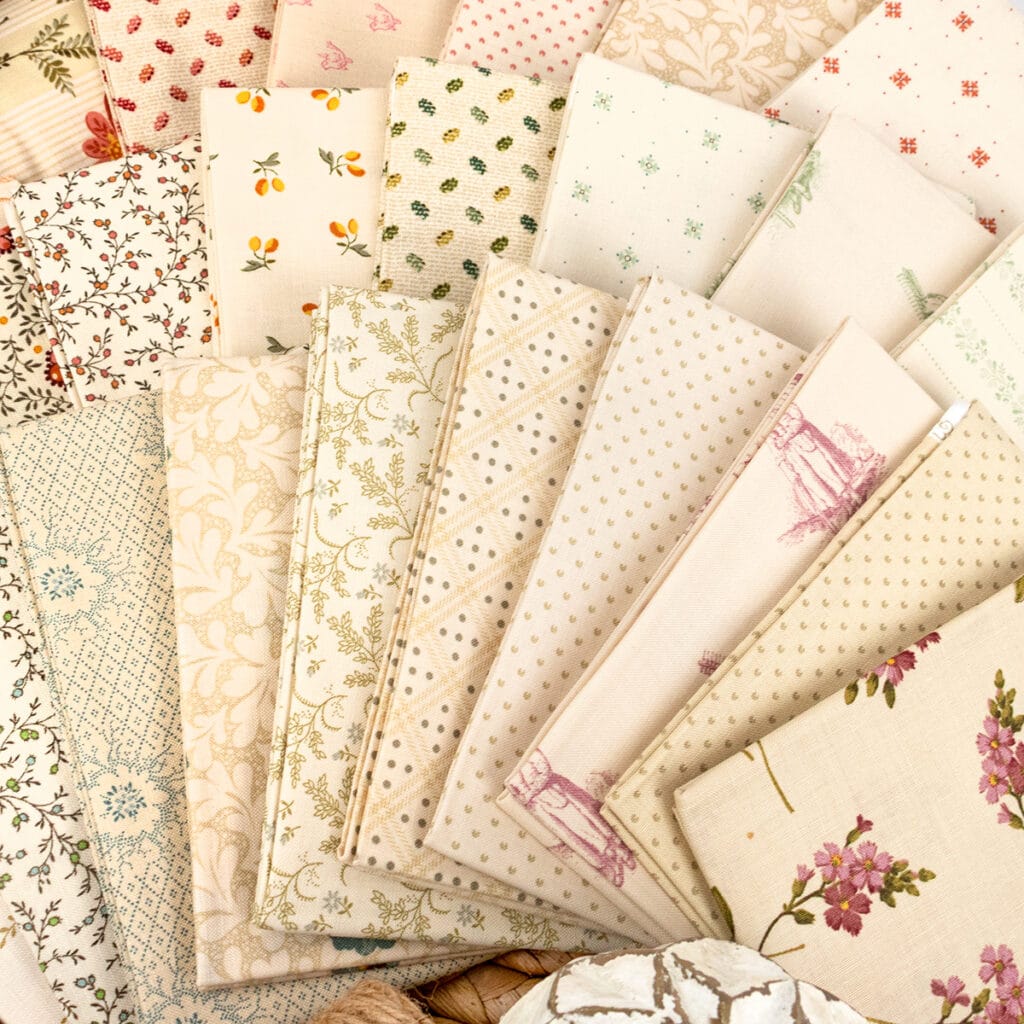
Discover why calming neutrals are the hottest quilting trend right now, plus how to turn leftover Fat Quarters into adorable DIY Design Boards with this easy tutorial.
Welcome to a brand new series here on the blog: Sewing the Trends! Throughout this series, we'll be making one quilt together while exploring a different quilting trend in each post. First up? Calming neutrals! With the Pantone Color of the Year being Cloud Dancer (an airy white), it's no surprise that soft, soothing neutrals are taking center stage. And honestly? It's the perfect excuse to let Background Bundles step into the spotlight for your next quilt. Plus, we're giving those leftover Fat Quarters a second, trendy life in your sewing space by revisiting our favorite sewing room DIY invented by the amazing Lori Holt: Design Boards!
### The Trend: Calming Neutrals
The Pantone Color of the Year is always a good reference for the broader trends we see in fashion and decor. From the elevated basics of celebrity street style to the minimalist yet inviting interior designs that are rising in popularity, Cloud Dancer shows just how striking neutrals can be when they take center stage. As quilters, an easy way to play with this trend is to simply swap your background fabric for a color and make your main fabrics the neutrals! It flips the script in a way that feels fresh and modern, but still classic.
Think about it: cream, ivory, soft gray, and warm taupe aren't boring. They're the quiet stars that let texture and shape shine. And in a world that feels loud, there's something deeply satisfying about stitching with a palette that whispers instead of shouts. Whether you're making a gift for a minimalist friend or just craving some calm in your own home, this trend is worth exploring.
### Why Background Bundles?
Usually, backgrounds and blenders play the supporting role to the eye-catching prints of our favorite collections. Other precuts, such as Layer Cakes and Jelly Rolls, tend to feature the colorful fabrics, but with Fat Quarter Bundles, Background Bundles are often available to shop as well! However, without a scrappy project planned or a stash re-stock in mind, these bundles of cozy cuteness can often be overlooked.
That's a shame because they're actually workhorses. A good background bundle gives you the flexibility to mix and match without worrying about running out of a crucial neutral. Plus, they're perfect for projects where you want the focus on quilting stitches, not busy prints. So if you've been passing them by, it's time to give them a second look.
### The Rows of Bows Quilt by Kassidy Grace
For the featured quilt in this series, we're making the Rows of Bows Quilt by Kassidy Grace using the Laundry Line Fat Quarter Bundle by Laundry Basket Quilts for Andover Fabrics. The subtle touches of color bring life to the cream backgrounds, and the vintage prints add a timeless charm to this trending color palette. It's a pattern that feels both nostalgic and completely current, which is exactly what we love about this trend.
The best part? The pattern calls for 12 Fat Quarters, but the bundle comes with 24! That means you'll have plenty of extras to play with for our DIY project below. Waste not, want not, right?
### Other Background Bundles We're Loving
If you're looking to stock up, here are some other fantastic options that have caught our eye:
- Snow Flurry Fat Quarter Bundle by Laundry Basket Quilts for Andover Fabrics
- Backgrounds Baked with Love Fat Quarter Bundle by Lori Holt for Riley Blake Designs
- Gentler Times Background Fat Quarter Bundle by Lori Holt for Riley Blake Designs
- Backgrounds Farmer's Daughter Fat Quarter Bundle by Lori Holt for Riley Blake Designs
- Backgrounds Home Town Holiday Fat Quarter Bundle by Lori Holt for Riley Blake Designs
- Autumn Backgrounds Fat Quarter Bundle by Lori Holt for Riley Blake Designs
- Quail Run Backgrounds Fat Quarter Bundle by Kansas Troubles Quilters for Moda Fabrics
- Essentials White on White Stocking Stuffers 2 Fat Quarter Bundle by Wilmington Prints
- Sparkle Elements Fat Quarter Bundle by Art Gallery Fabrics
- Butter Churn Basics Vol. 2 Fat Quarter Bundle by Kim Diehl for Henry Glass Fabrics
- Prairie Backgrounds II Fat Quarter Bundle by Pam Buda for Marcus Fabrics
- Backgrounds Eyelet Fat Quarter Bundle Curated by Fat Quarter Shop
Each of these brings its own subtle personality, so you can pick the one that speaks to your style.
### Lori Holt's DIY Design Boards
We love having a stack of Lori Holt's Design Boards at the ready in our sewing room. Whether you shop her pre-made Design Boards or decide to make your own, they are a must-have notion that's as cute as it is handy! For an in-depth video tutorial from the creator herself, watch the tutorial on Lori Holt's channel, or the one she filmed with us. Then, keep reading to see our quick and easy overview of this scrap-friendly DIY.
> "Design Boards changed the way I work. They keep everything organized and within reach, and they look adorable on the wall." — A happy quilter
### Step 1: Gather Your Supplies
The Rows of Bows pattern calls for 12 Fat Quarters, and the Laundry Line Fat Quarter Bundle has 24! That means we have plenty of extra Fat Quarters to play with once we've picked which 12 go in the quilt. Here is the complete list of supplies you need for this quick DIY:
- Leftover Fat Quarters
- Foam Core Board (cut to your desired size)
- Batting
- Rotary Cutter
- Scissors
- Creative Grids Ruler
- Hot glue gun (or spray adhesive)
### Step 2: Cut and Layer
Start by cutting your foam core board to your preferred size. A 12-inch square works well for most projects, but you can go bigger if you like. Then, cut a piece of batting slightly larger than the board. Lay the batting over the board and trim it to fit exactly. This gives you a soft, pin-friendly surface that's perfect for arranging blocks.
### Step 3: Wrap the Fabric
Now take your leftover Fat Quarter and lay it right side down. Place the foam core board on top, centered. Pull the fabric tight over the edges and secure it with hot glue on the back. Fold the corners neatly like you're wrapping a gift. Once all four sides are glued down, let it cool completely.
### Step 4: Display and Use
Once your Design Board is assembled, you can prop it up on your sewing table or hang it on the wall. The fabric surface makes it easy to pin fabric pieces without damaging them. It's perfect for auditioning quilt blocks, keeping pieces organized, or just adding a pop of color to your space. And since you're using scraps, it costs almost nothing to make a whole set!
### Final Thoughts
Calming neutrals are more than just a passing trend—they're a way to bring peace and intention into your creative space. Whether you're stitching up the Rows of Bows quilt or whipping up a set of Design Boards, we hope this series inspires you to try something new. Happy sewing!