The Cross Stitch Wall That Took Over My Studio
Jennifer Taylor ·
Listen to this article~5 min
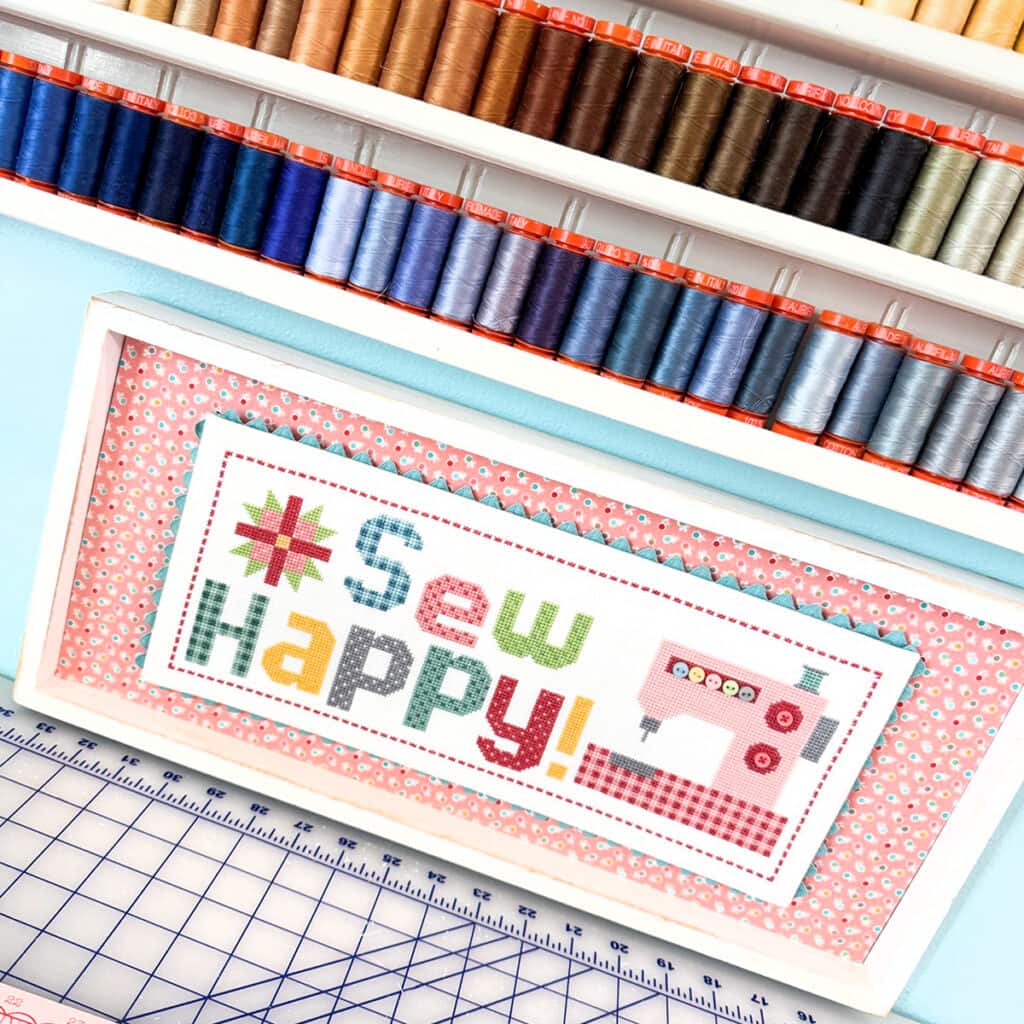
Ever wondered how to turn a pile of finished cross stitch pieces into a stunning wall display? Here's the full tour of my sewing studio wall — plus every pattern I used and the lessons I learned along the way.
I never planned to cover an entire wall with cross stitch. It just sort of happened — one finish at a time, until my sewing studio looked less like a workspace and more like a tiny museum of everything I've ever loved stitching.
People keep asking about it, so here's the full tour. Every piece on that wall started as a pattern I couldn't stop thinking about. Some took a single weekend. Others stretched across weeks of late-night stitching sessions with a cup of tea going cold beside me. Together, they tell the story of my last few years in thread.
### Why I Started Hanging My Finishes
For a long time, my finished pieces lived in a drawer. Sad, right? All that work folded up and forgotten. One day I finally asked myself why I was hiding the things I was most proud of.
The answer was simple: I was scared of commitment. Hanging something meant deciding it was good enough. But here's the thing — cross stitch isn't about perfection. It's about the hours you poured in, the mistakes you stitched over, and the joy of seeing it all come together.
So I picked a wall, grabbed some frames, and started hanging. Best decision I've made in years.
### What's Actually on the Wall
My wall is a mix of styles, and honestly, that's what makes it interesting. Here's what's up there:
- **Sew Happy** by Lori Holt of Bee in my Bonnet — the piece that started it all
- **You are the Boss** by Lori Holt — a daily reminder I need more often than I'd like to admit
- **Sew She Did** by Lori Holt — because sometimes you just need to celebrate yourself
- **Cut Press Sew** by Lori Holt — a love letter to the basics
- **The Bonnie & Camille Quilt Bee** book — the source of more than one finish on this wall
- **Stitchers Gonna Stitch** — a Fat Quarter Shop exclusive, and yes, it's as fun as it sounds
- **Stitch-O-Graphy** and **Quilt-O-Graphy** — also Fat Quarter Shop exclusives, and they pair beautifully together
- **I'm Just Saying** by Lori Holt — cheeky and quick to stitch
- **Bee Joyful** by Country Cottage Needleworks — the sweetest little bee you'll ever make
- **Stationery Addict** by Little Dove Designs — for anyone who hoards notebooks like I do
- **Sew Blessed** by October House Fiber Arts — the piece that makes me pause every time I walk past it
Every single one of these patterns is still available, so if something catches your eye, you can track it down and stitch it yourself.
### The Corners You Haven't Seen Yet
Here's a secret: the wall isn't the whole story. I've tucked smaller finishes into corners all over my studio — above the ironing board, beside my thread rack, even on the inside of a cabinet door.
> "A finished stitch deserves to be seen, not stored."
That's become my unofficial motto. It changed how I think about finishing projects. Instead of waiting for the perfect frame or the perfect spot, I just hang it. Done is better than perfect.
### What I've Learned From Filling a Wall
Building this wall taught me a few things worth sharing:
- **Mix your sizes.** Big statement pieces next to tiny quick stitches create rhythm.
- **Don't match frames.** Different finishes in different frames feel collected, not coordinated — and that's the charm.
- **Leave room to grow.** I've rearranged this wall at least six times. That's part of the fun.
- **Stitch what you love.** Every piece here is something I genuinely enjoyed making. No filler, no obligation.
If you're staring at a drawer full of finished pieces right now, consider this your sign. Pick a wall. Grab a frame. Start hanging.
### Your Turn
What are your favorite cross stitch finishes so far this year? I'd love to hear about them — drop a comment below, or share them on Instagram and tag @fqsxstitch so I can see your work and cheer you on.
Happy stitching!